Pictures of Herons
05/08/2013 1 Comment

What do you need to take a good photo of a heron? A camera, sure. A heron, definitely. But there’s a bit more to it than that.
If you follow me on twitter you have probably seen, in recent weeks, me posting some of the photos that I’ve taken and a lot of them have involved that magnificent bird, the grey heron. I did some Binging (I don’t use Google anymore, evil bastards) of heron photos and I reckon mine stack up quite well. I therefore thought I’d put down the things I’d learnt – mainly through trial and error. That way, if you decide to take some pictures of a heron, you might have a bit of a head start.
Equipment
You’ll need a camera that does this:
- Gives you quick access to adjust shutter speed, aperture, ISO and (ideally) focus point
- Focuses very quickly
- Has a high frame rate, i.e. can take lots of photos very quickly
- Shoots at higher ISOs without noticeable degradation in image quality
This almost certainly means an SLR. There are some non-SLR cameras that can do these things but they are insanely expensive. The Fuji X-Pro1 and Leica M9 are examples of this but even they have a limitation that an SLR does not. In addition to the above requirements you need a long lens – basically the longer the better. A heron is a big bird but they are shy as hell and don’t appreciate someone standing right next to them. You might be able to get away with a 200mm lens but 300mm is going to be much more reliable. Most SLR manufacturers offer zoom lenses up to 300mm that are not insanely expensive. Of course, if you have the budget to go above 300mm, even better.
Portraits
Getting a good portrait shot of a heron is extremely tricky. Even with a long lens you need to be pretty close in order to get their head to fill the frame. Let’s assume you have managed to sneak up close enough. What do you do?
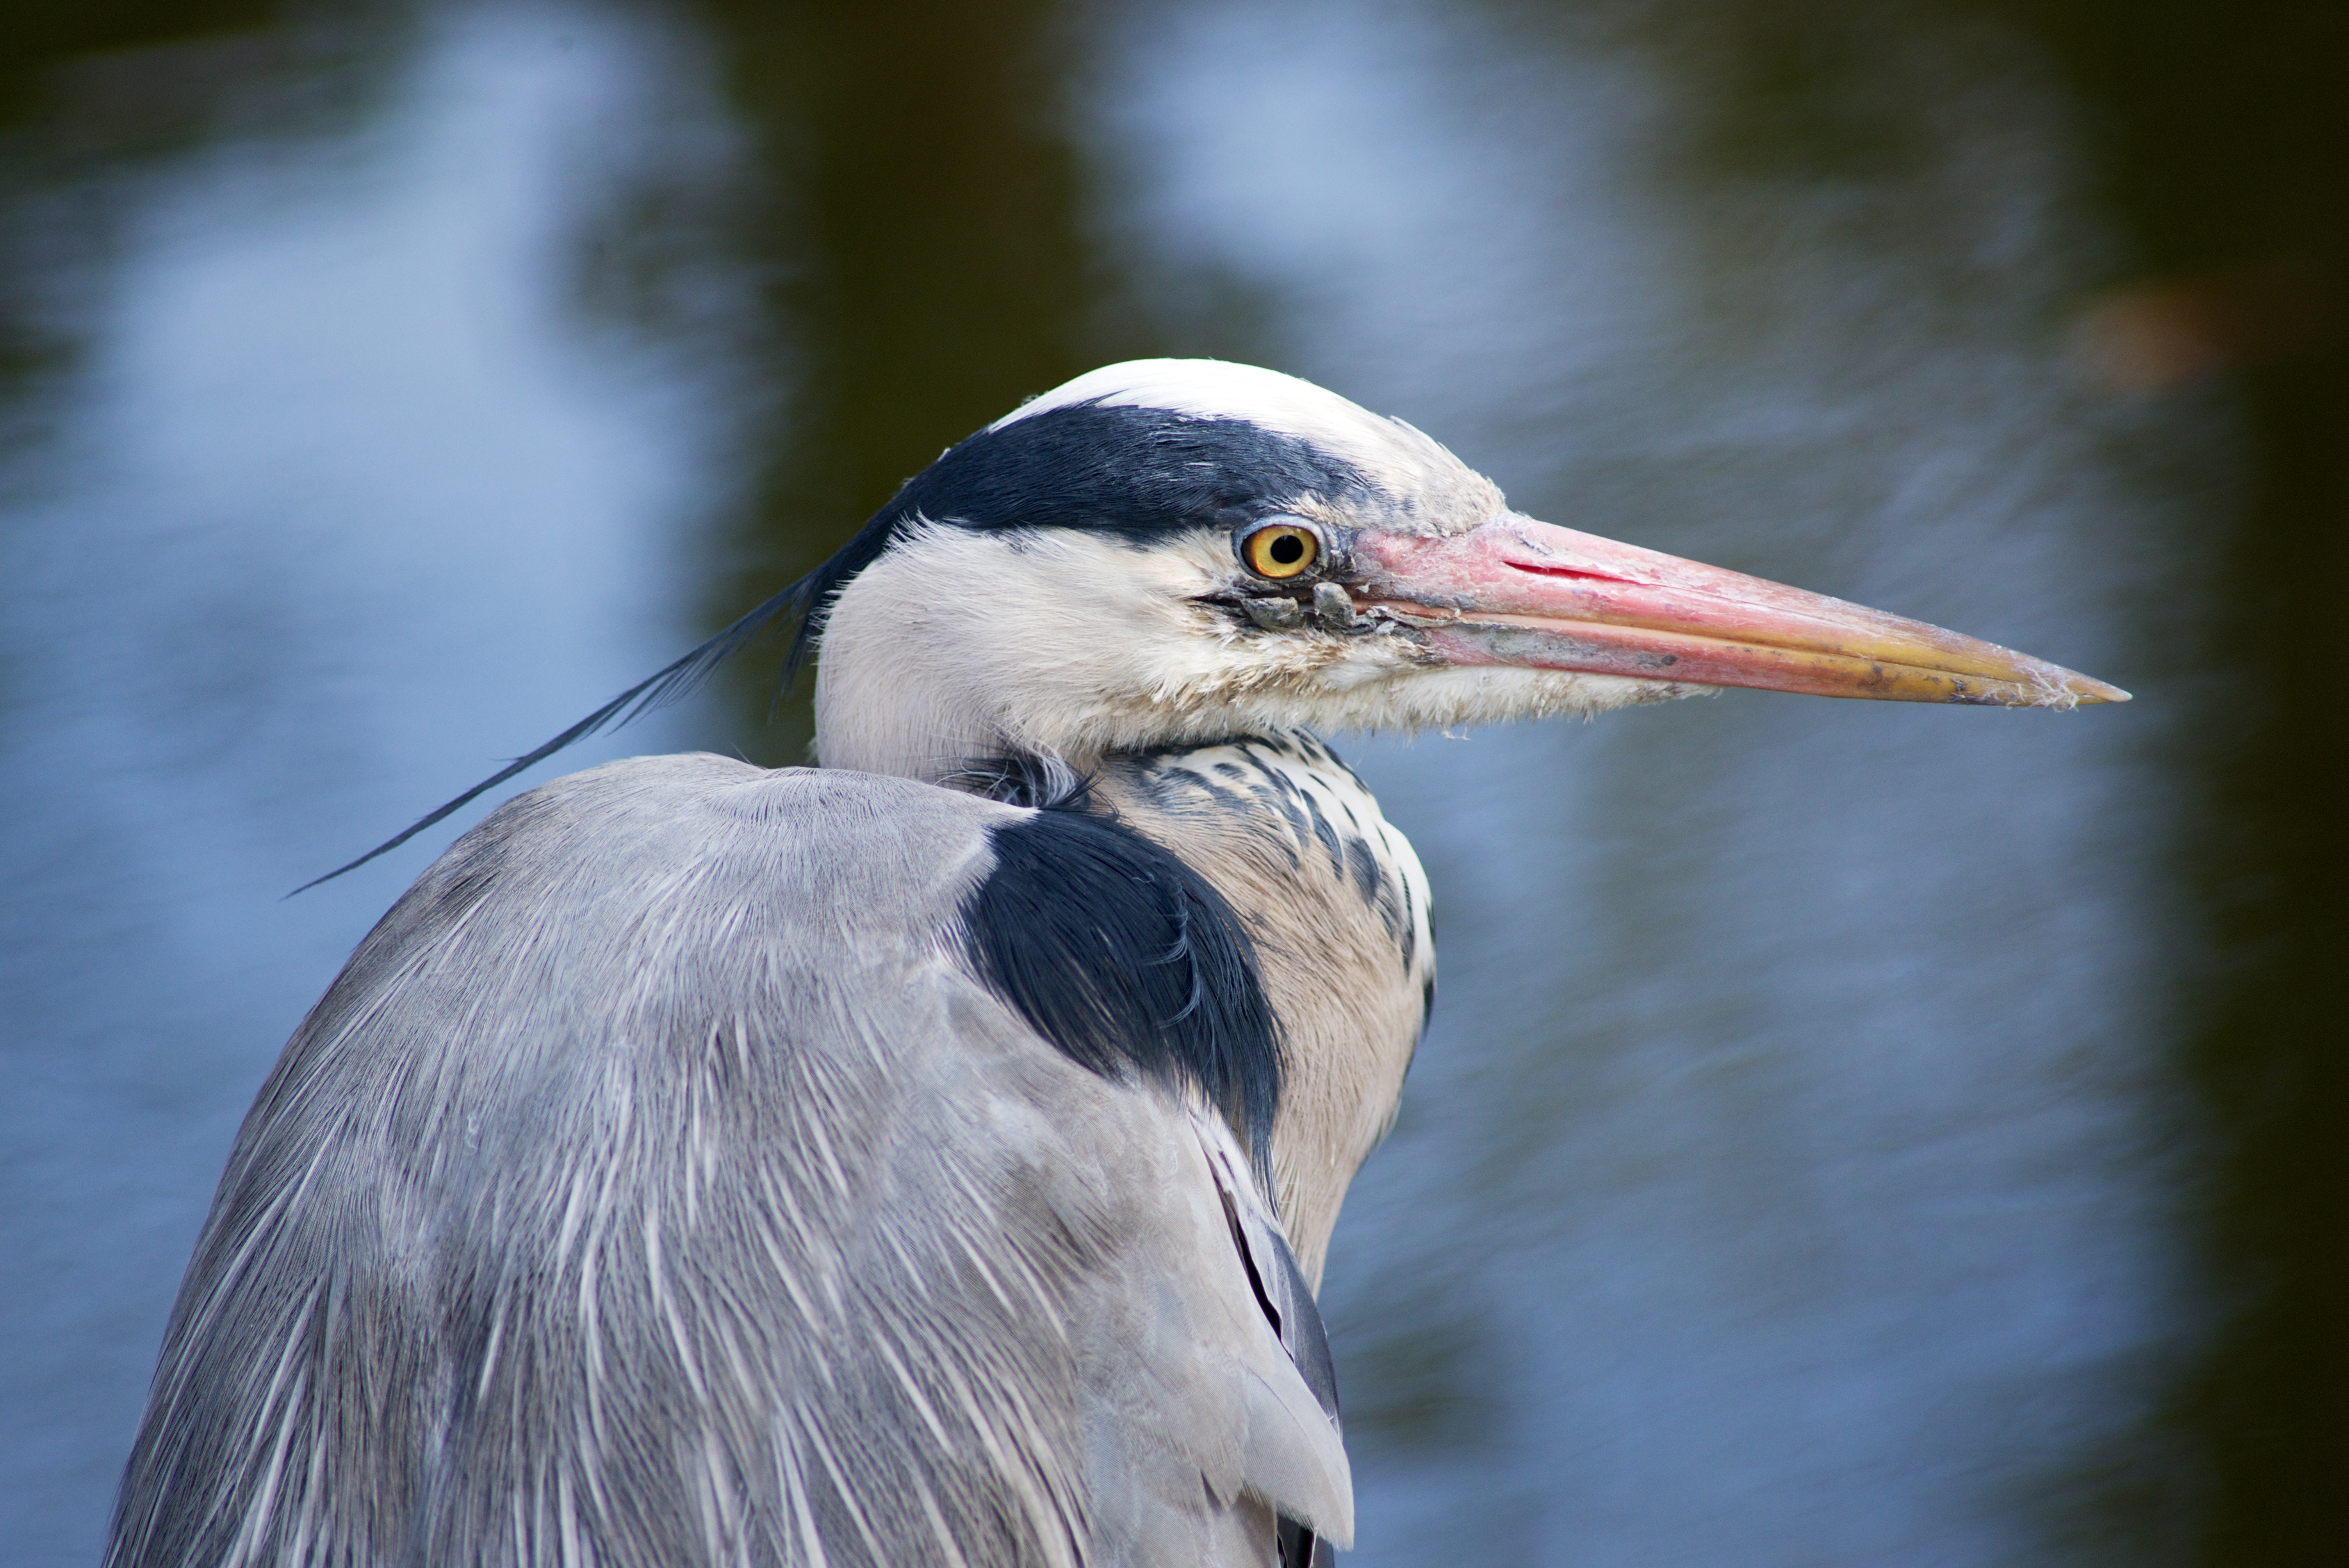
Firstly set your aperture. To get that perfect shot you need every bit of the heron’s head in focus and everything else out of focus. You will be shooting with a long lens so a shallow depth of field should be natural. The problem I actually find is making sure that the depth of field is not too narrow. Herons have long beaks. This means that the tip of the beak can easily be a different distance away from you than the heron’s eye. For a decent portrait you need both to be sharply in focus.
As far as possible you want a perfect side view so that the tip of the beak is the same distance as the eye. Always focus on the eye though – if the tip of the beak is very slightly unsharp you might be able to get away with it. If the eye is slightly unsharp then the image is useless.
Light
The best light for photos is early morning or late evening when the sun is low and the light isn’t harsh. I tend to go out early in the morning at the weekends because Mrs Rabbit likes a lie in anyway. If you’re very lucky you might even be able to get the early morning light behind the heron, which can create a halo effect around it. In this photo the light coming from behind the heron makes the shot – the golden glow of the sun around the head, neck and beak. Without it, it would be fairly dull.

Additionally, if you are taking the photo in very bright sunshine, the white feathers on the heron’s face and neck can look washed out. Early or late in the day is the best time.
Behaviour
Herons tend to spend most of their life doing nothing. They can happily stand motionless for hours in the same spot but if you can catch one doing something you can make a much more interesting photo.
This is demonstrated, albeit brutally, by this shot. A heron I was watching grabbed a new-born duckling and gobbled it up.

There isn’t any sure-fire way to be in the right place when something like this happens. As I say, often herons will just sit doing nothing. But if you spend time watching their behaviour you can start to predict when they are just going to sit there for hours and when they are going to do something. If you watch a heron for five minutes and it takes no footsteps and it does nothing other than preen its feathers there is a good chance it will do nothing for the next hour. If it seems to be scanning the water, walking around, stretching its legs, looking left and right, then it is in active mode and there is a good chance you will observe hunting behaviour or if you’re really lucky a take-off…
In Flight
So you have found your heron, you have got close enough to it, it’s walking about and looking around. There is a good chance you are about to see a take-off. If you can capture that you might get a really special shot. The difficulty is that if the heron does decide to take off, it will do it extremely quickly. You will have no time to adjust your camera settings or even to bring your camera up to your eye. Those things all need to be done beforehand and you just need to wait ready to go, with your finger on the shutter-release. Sometimes you can wait for ages and they never take off.
Sometimes they do…

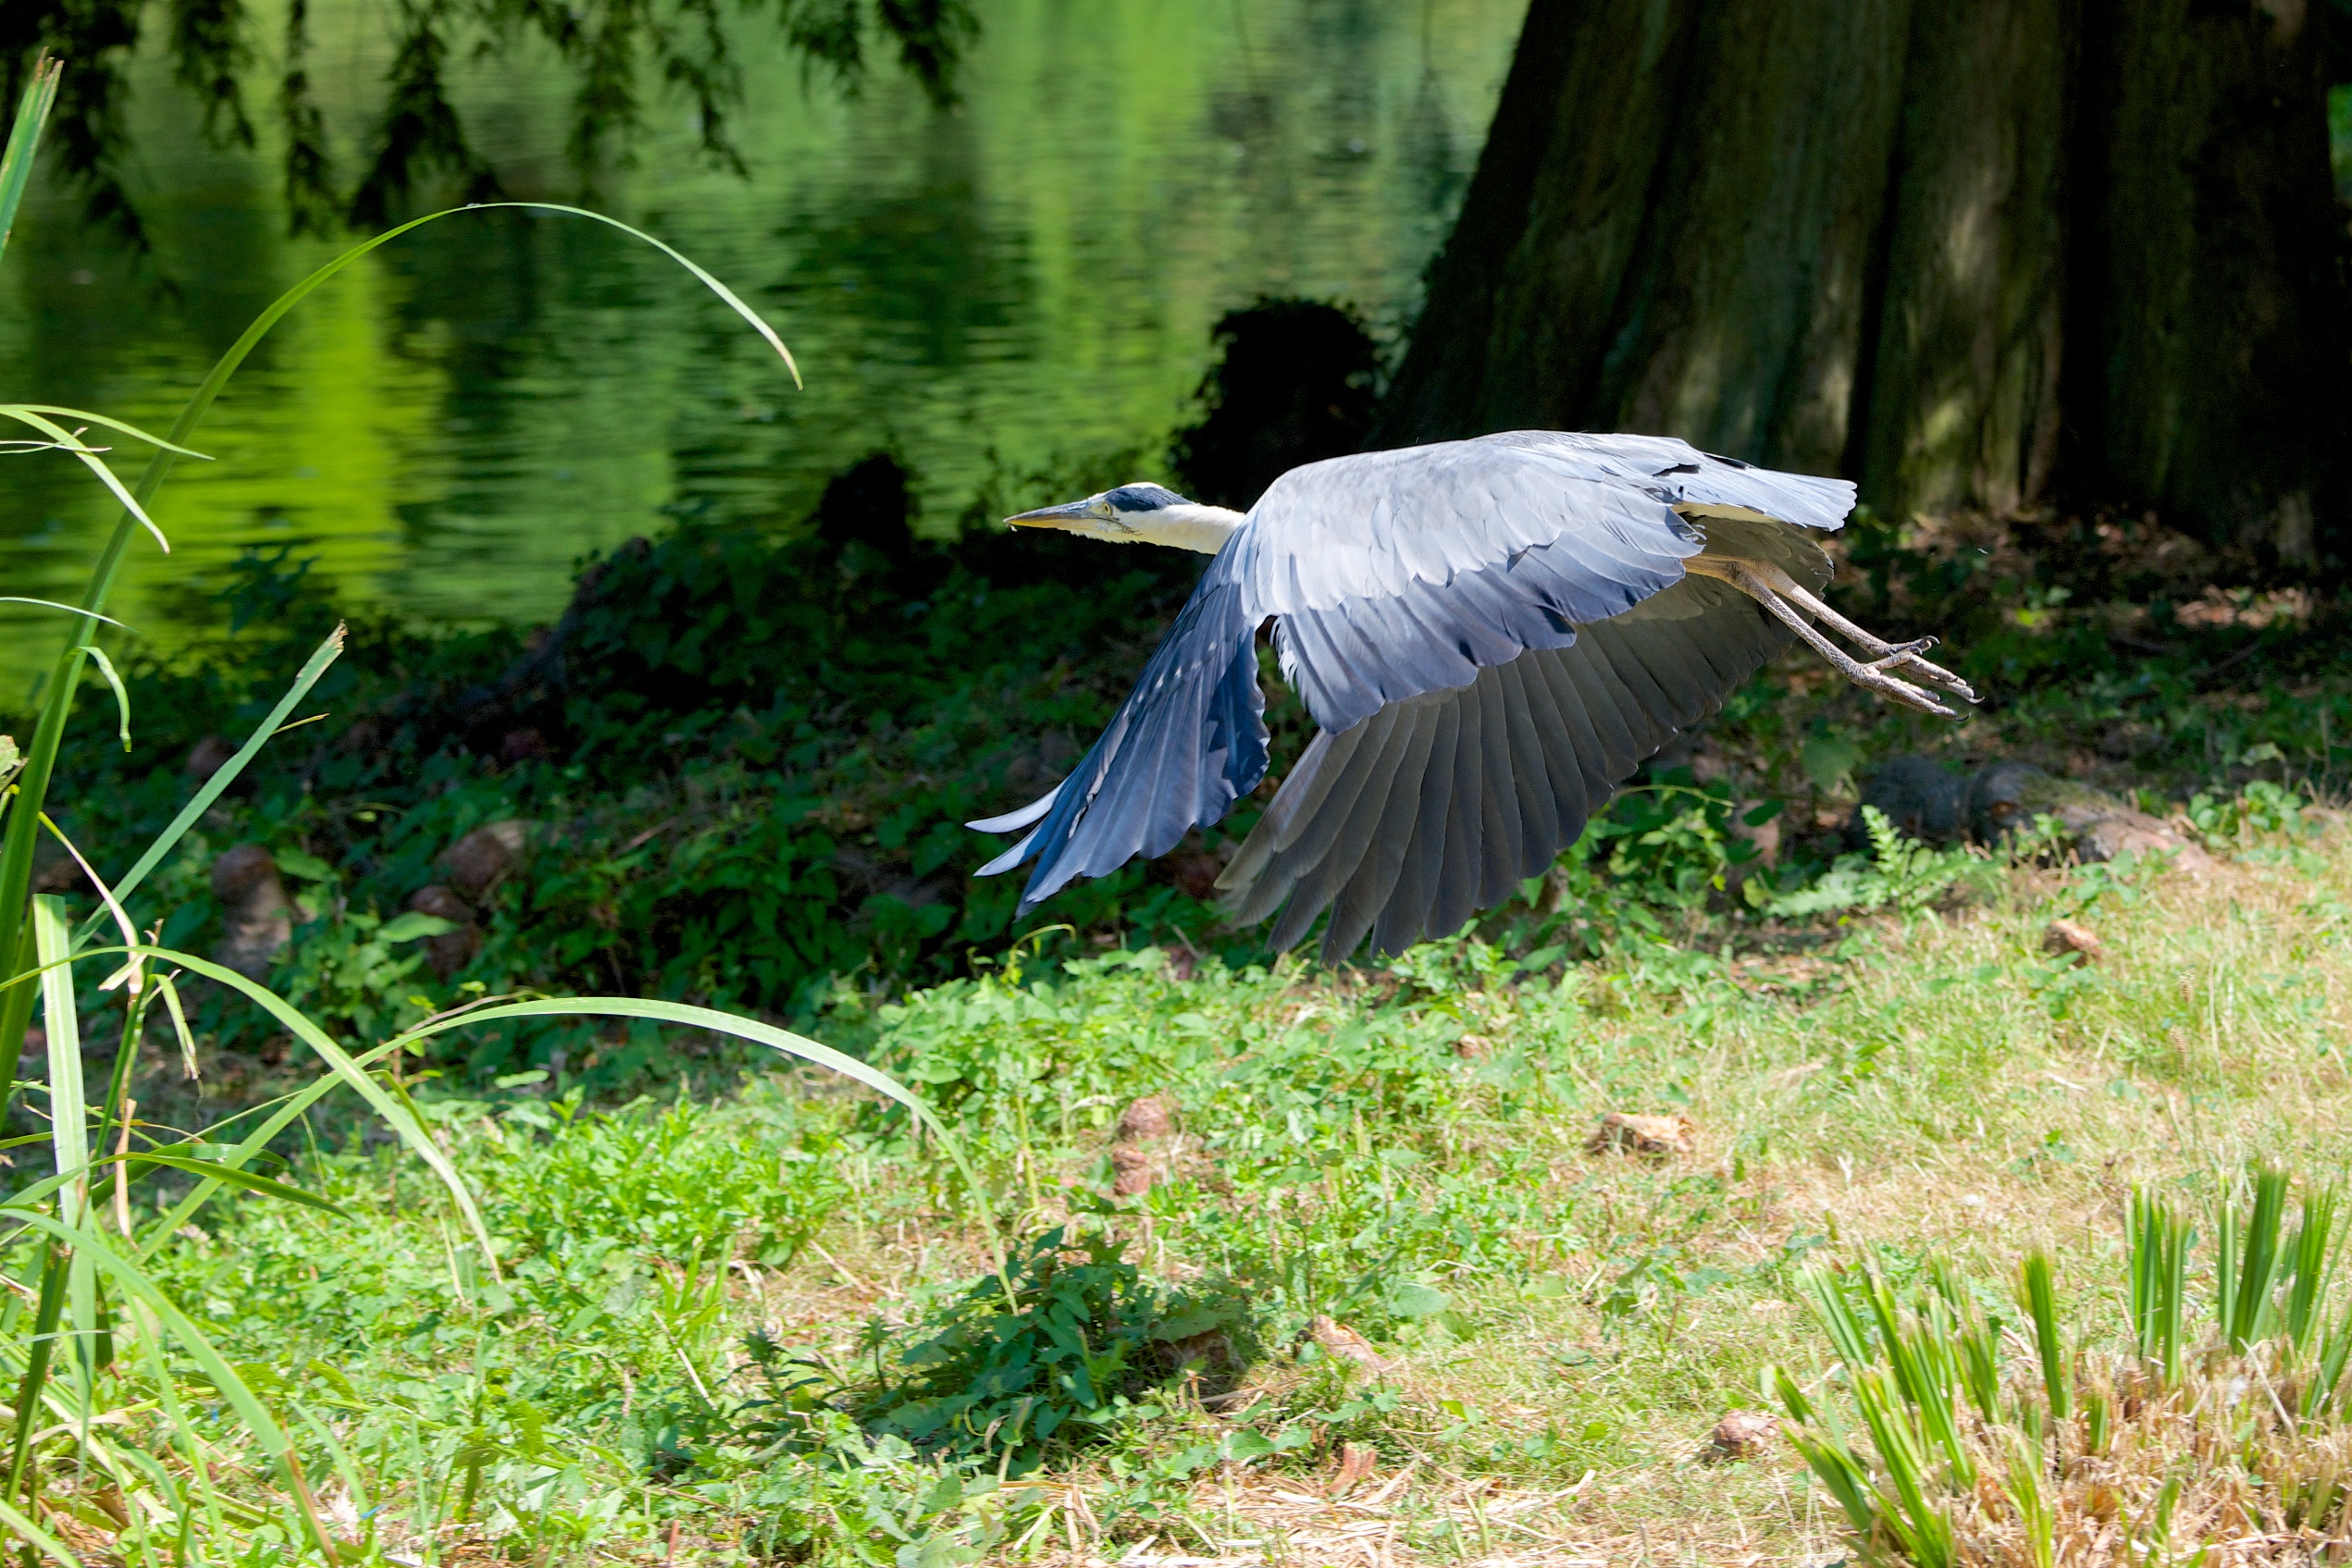

Shots like these underline why my recommendations on the type of camera are so important. A heron goes from standing to flying very quickly – you need a quick focusing camera to get a sharp image of what is a rapidly moving target. You also need a camera that can give you a very quick shutter speed in order to freeze the heron in motion. And if your camera takes five shots in the second it takes the heron to fly off rather than two, you multiply your chances of getting a good shot by 2.5. Given how infrequently these opportunities come up, that’s a massive advantage.
Anyway, this is what I’ve picked up through trial and error and I have added a bit more below regarding some camera settings for those who want to try this. These tips are not the be all and end all though. If you have a camera that doesn’t focus very quickly or a lens that doesn’t go to 200mm or 300mm, it doesn’t mean you won’t get a good shot – the tips I have just increase your probability of getting one. The person behind the camera is always more important than the camera itself.
Anyway, if you know a heron that lives near you, why not give this a go? It’s great fun and so rewarding when one of your attempts comes off.
Happy snapping.
RedEaredRabbit
A Few Technical Details…
Mode
I generally shoot in Manual. That is I manually set both the shutter speed and the aperture. That sounds like a lot of work but if you have an SLR then it will give you very quick access to set these and with a bit of practice it won’t be a problem. I start by choosing the aperture that I need – I want to set it such that I can get a sharp image of the heron but a nice blurry background. After this I set the shutter speed – essentially as quick as possible without hitting an ISO level that will compromise image quality. This will vary from camera to camera but again, with an SLR you should have a lot more flexibility in this respect.
Focusing
You definitely need your camera set to continuous focusing – i.e. as the subject moves your camera adjusts focus. There are a bunch of settings on my camera that allow me to choose how many focus points are used when doing this. I need more time to play with this to decide which one to use in which circumstances but the basic one of using just 9 points is my default and seems to work very well.
SLRs (and high end compacts and mirrorless cameras) let you select the focus point you want to use. This is really, really useful. If you want to take a portrait shot then you can move the focus point to the heron’s eye. If you want to take a flight shot then you can decide in advance – when this heron takes off, do I want it in the middle of the picture, the left, the right, the top or the bottom?
Another point on focusing. Some SLR cameras have an AF-ON button allowing you to focus with your thumb rather than the more common half-pressing of the shutter release. For me* this works much better – right thumb for focusing and right index finger for taking the photo. This is a lot easier than using one digit for both.
Equipment
I’m using a Nikon D600 and mostly a 80mm-400mm f4.5-5.6G lens. The long primes will certainly be sharper with bigger max apertures but they are so expensive that they are really only within the budgets of professionals.
*Actually my camera doesn’t have a dedicated AF-ON button but there is a custom setting to assign it to another button, so if yours doesn’t have one, then check the custom settings.


